
How to Install a Car Lift in Your Garage: Setup Guide for 2026
Learn how to install a car lift in your garage in October 2026 with slab PSI rules, ceiling clearance checks, and step-by-step mechanical assembly steps.
 By Hank O'Hop
Updated October 10, 2026
By Hank O'Hop
Updated October 10, 2026

Vertical ceiling clearance and concrete slab integrity represent the two most critical structural factors when planning a vehicle service bay in a residential workshop. Before bringing heavy equipment into your garage, you must verify ceiling height, garage door track positioning, and concrete thickness to ensure safe operation. Exploring dedicated residential car lift systems can help you evaluate how different lifting footprints match your available floor space and overhead rafters.
Understanding how to install a car lift in your garage requires careful preparation, ranging from measuring electrical circuit capacity to marking precise anchor bolt locations. Surface-mounted two-post lifts, four-post storage racks, and mid-rise scissor frames each impose distinct foundation requirements and mechanical assembly steps. Familiarizing yourself with standard hydraulic car lift designs provides a clear baseline for handling high-pressure fluid lines, mechanical safety locks, and column alignment before tightening your first floor anchor.
| Award | Product | BJL Score About BJL ScoreThe BJL Score is our own rating from 0 to 10, based on performance, design and build, ease of use, and value. It reflects independent research and is never influenced by manufacturers, retailers, or affiliate commissions. Learn more › | |
|---|---|---|---|
| Best Overall |
LGYORWAY Portable Car Lift
|
9.2/10 | Buy |
| Best Budget |
 Albott 7000 LBS Portable Car Lift with Extension
|
8.6/10 | Buy |
| Best Premium |
 Portable Two Post Car Lift 8000 LBS Capacity
|
8.3/10 | Buy |
| Best Value |
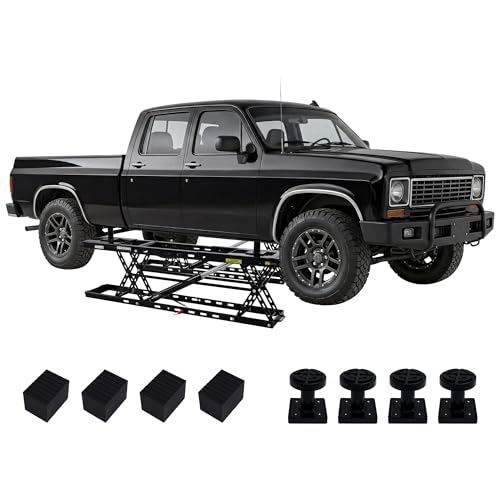 Albott 8000 LBS Portable Car Lift for Home Garage
|
7.8/10 | Buy |
 BIFULDYO Portable Car Lift for Home Garage
|
7.8/10 | Buy |
Planning and Executing Your Garage Car Lift Installation
Installing an automotive lift in a residential garage transforms your workspace from a cramped floor into an efficient service bay. Successful assembly requires precise dimensional planning, structural slab verification, and systematic mechanical execution. Following a methodical, safety-focused installation routine ensures your equipment operates reliably while protecting both the operator and the vehicle.
Measuring Vertical Ceiling Clearance and Overhead Obstructions
Accurate ceiling height measurement serves as the starting point for any garage installation project. You must calculate the total height of the lift columns alongside the maximum raised height of your tallest vehicle. A basic vehicle clearance formula combines vehicle roof height, maximum carriage rise, and at least four to six inches of overtravel clearance to disengage mechanical safety locks. Neglecting this buffer can cause a raised vehicle roof or truck cab to contact drywall, exposed ceiling joists, or overhead light fixtures.
Standard residential overhead garage doors frequently interfere with vertical lifting clearance when raised. Roll-up doors with horizontal tracks often cut directly across the space needed for a raised vehicle chassis. Many homeowners resolve track conflicts by converting standard garage door assemblies into high-lift or vertical-lift track configurations. Upgrading to a wall-mounted jackshaft garage door opener also eliminates ceiling-mounted opener motors and central pull tracks that obstruct vehicle elevation.
Concrete Slab Verification, PSI Ratings, and Post-Tension Risks
Surface-mounted lifts place substantial tensile and shear stresses on the concrete garage floor beneath each column baseplate. Most two-post manufacturers require a continuous concrete slab with a minimum thickness of four inches and a compressive strength of at least 3,000 PSI cured for a minimum of 28 days. Test drilling with a hammer drill allows you to verify physical slab depth before ordering equipment or beginning assembly. Never attempt to secure a surface-mounted frame to cracked, crumbling, or unreinforced residential slabs.
Post-tension concrete foundations introduce severe structural hazards during anchor installation. Striking an internal high-tension steel cable with a concrete drill bit can cause catastrophic slab cracking or explosive tendon rupture. Homes constructed on post-tension slabs typically feature a stamp in the concrete or documentation in structural building plans. If you suspect your garage floor utilizes post-tension engineering, arrange for professional ground-penetrating radar scanning to locate cables before drilling a single hole.
Selecting Lift Architecture for Bay Dimensions and Service Needs
Matching hoist architecture to your physical garage dimensions dictates both workspace functionality and floor preparation. Surface-mounted two-post lifts provide open underbody access for transmission swaps and suspension work but require heavy floor anchoring. In contrast, freestanding four-post storage lifts offer drive-on convenience for vehicle stacking and fluid service while distributing vehicle weight across four wide baseplates. Portable mid-rise scissor lifts and mobile single-post wheel lifts provide flexible lifting for tire and brake maintenance without requiring permanent floor bolts.
Swing-arm geometry heavily influences vehicle positioning and door clearance inside narrow two-car garages. Asymmetric two-post columns rotate thirty degrees backward and use staggered arm lengths to position the vehicle center of gravity toward the rear. This geometry allows vehicle doors to open wide enough for passenger egress without striking steel column faces. Symmetric column configurations balance vehicle weight evenly between posts, which works well for long-wheelbase pickup trucks and commercial utility vans.
Electrical Service Sizing and Motor Circuit Wiring
Hydraulic power units require adequate electrical supply to lift rated capacities without stalling or tripping breakers. Compact portable car lifts and light-duty scissor platforms often operate on standard 110V or 120V dedicated 20-amp circuits, providing simple plug-and-play capability for residential garages. Higher-capacity commercial hoists and heavy two-post models, such as 8,000-pound electric-hydraulic systems, generally demand a dedicated 208V to 240V single-phase circuit with a 30-amp breaker. Supplying insufficient voltage can cause electric motor windings to overheat, shorten pump lifespan, and slow lifting cycle speeds.
Running dedicated wiring from your main electrical panel directly to the power unit prevents nuisance circuit trips. You should use properly sized wire gauges, such as 10 AWG copper conductors for 30-amp 240V runs, to prevent significant voltage drop under load. Never operate an electric-hydraulic pump on a shared convenience outlet or lightweight household extension cord. Engaging a licensed electrician guarantees that your motor disconnect switch, breaker sizing, and grounding meet local electrical codes.
Staging Tools, Rigging Equipment, and Site Layout Mapping
Proper tool staging prevents delays and safety hazards when positioning heavy steel structural components. You will need a heavy-duty rotary hammer drill, carbide-tipped concrete bits, a certified foot-pound torque wrench, steel horseshoe shims, and high-quality bubble levels. Moving steel columns weighing hundreds of pounds requires lifting aids such as engine hoists, transmission jacks, or a team of assistants. Preparing these tools beforehand ensures that components can be positioned smoothly without dropping or shifting out of square.
Layout mapping establishes the exact physical footprint of the lift relative to garage walls and entrance doors. Snap chalk lines across the floor to mark the drive-through centerline, column baseplate edges, and vehicle approach path. Maintain at least six to eight inches of setback distance from existing concrete expansion joints, saw cuts, or outer slab perimeters. Verifying that the column baseplate chalk lines form a precise rectangle ensures that the columns will remain parallel and plumb.
Drilling, Setting, and Torquing Concrete Wedge Anchors
Anchoring columns requires rigorous drilling technique to achieve maximum mechanical holding strength in cured concrete. Mount the correct diameter carbide drill bit into a rotary hammer and drill perpendicular to the floor slab through the baseplate mounting holes. Maintain steady downward pressure without wobbling the hammer drill to avoid widening the hole diameter. Use compressed air, a wire bottle brush, and an industrial vacuum to remove all pulverized concrete dust from the hole prior to anchor insertion.
Tap wedge anchors into the cleaned holes until the threaded collar and washer sit flush against the steel baseplate. Place steel horseshoe shims beneath the baseplate corners to bring each column into true vertical plumb before tightening. Use a calibrated torque wrench to tighten anchor nuts to the manufacturer’s specified foot-pound rating, typically between 85 and 110 foot-pounds depending on bolt diameter. Avoid overtightening anchor bolts, which can fracture the underlying concrete cone and destroy pull-out resistance.
Erecting Columns, Overhead Crossbeams, and Carriage Assemblies
Raising vertical columns demands controlled rigging to avoid tipping or structural damage during assembly. With baseplates positioned over anchor marks, walk the first column upright using an engine hoist or mechanical rigging straps. Secure several anchor nuts finger-tight to stabilize the column before raising the opposing column into position. For clear-floor two-post designs, lift and bolt the overhead crossbeam between the top column caps before fully tightening the bottom anchor bolts.
Installing lifting carriages inside the vertical column tracks requires careful handling of internal slider blocks. Lubricate the internal column slide channels with heavy-duty white lithium grease to promote smooth carriage travel and minimize friction. Slide each carriage into the column channels, making sure internal safety lock latches clear the column ladder slots. Connect lifting chains or direct-drive hydraulic cylinder rods to each carriage according to the specific manufacturer schematics.
Equalization Cable Routing and Dual-Carriage Synchronization
Equalization cables maintain level carriage travel and prevent vehicle tipping during hydraulic operation. Route the aircraft-grade steel equalization cables through upper sheaves, under carriage pulleys, and across crossbeams following manufacturer routing diagrams. Cable routing must follow a crossed configuration so that an upward movement on one carriage pulls the opposing carriage upward at an identical rate. Inspect cable paths to verify that wire ropes do not rub against internal column brackets, electrical conduit, or hydraulic hoses.
Balancing cable tension ensures that both lifting carriages travel and lock in perfect mechanical unison. Similar to the calibration required on commercial heavy-duty shop lifts, you must adjust the threaded cable ends with locknuts until equal tension is achieved across both sides. When raising the lift, both mechanical safety locks should click into their corresponding ladder rungs at the exact same instant. Re-check cable tension after performing initial break-in cycles, as new wire ropes undergo initial seating under load.
Hydraulic System Assembly, Fluid Selection, and Cylinder Bleeding
Clean hydraulic assembly prevents fluid contamination and ensures dependable cylinder pressure. Thread high-pressure hydraulic hoses between the power unit manifold, hydraulic cylinders, and equalization junctions without kinking lines. Use appropriate thread sealant on standard pipe fittings while keeping flare and O-ring face seal fittings completely clean and dry. Fill the fluid reservoir with clean hydraulic oil, typically ISO 32, ISO 46, or Dexron III automatic transmission fluid, as specified by the equipment manufacturer.
Bleeding trapped air from hydraulic lines and cylinders eliminates spongy lifting action and erratic carriage descent. Crack open the cylinder bleeder screws located at the top of each cylinder while cycling the hydraulic pump slowly under no load. Allow foamy, aerated fluid to escape into a clean catch container until a steady stream of clear fluid appears, then tighten the bleeder valves securely. Cycle the lift through several full rise and lower sequences to verify consistent pressure and inspect all hose junctions for weeping fluid.
Safety Lock Testing and Final Operational Commissioning
Mechanical safety locks represent the primary barrier against catastrophic vehicle falls caused by hydraulic pressure loss. Test both column lock latches to ensure that spring-loaded pawls engage firmly into the column lock ladders at every mechanical increment. Never work beneath a raised vehicle that is supported solely by hydraulic pressure without lowering the carriage onto locked mechanical stops. Verify that manual lock release levers, pull cables, or pneumatic release cylinders disengage both lock pawls simultaneously before lowering.
Complete commissioning by conducting a staged weight test with a passenger vehicle before putting the lift into routine service. Position the vehicle center of gravity properly over the swing arms or runways, raise the chassis six inches, and perform a stability shake test. Raise the vehicle to mid-height, lower it onto the safety locks, and inspect all concrete baseplates for anchor movement or slab cracking. Re-torque all concrete wedge anchors with a torque wrench to ensure proper clamp force before signing off on the installation.
Installing an automotive lift in your home garage demands patience, mechanical precision, and strict adherence to structural requirements. Taking the time to verify concrete slab integrity, measure overhead clearances, and synchronize mechanical safety systems creates a secure lifting environment for years of reliable automotive service. Regular post-installation maintenance, including cable tension audits and anchor torque verification, ensures your garage setup remains dependable for every vehicle project.
About the author
Hank O'Hop writes about automotive tools, hands-on repairs, and the challenges of maintaining and improving project cars. His published work covers workshop equipment, engine hoists, power tools, and garage upgrades, offering practical insights for readers who prefer to understand their equipment before putting it to work.