
How to Install a Car Lift in a Garage: Complete Step-by-Step Guide for 2026
Plan how to install a car lift in a garage with proper concrete foundation, ceiling clearance, and electrical requirements for your workshop in October 2026.
 By Peter Nelson
Updated October 10, 2026
By Peter Nelson
Updated October 10, 2026

Transforming a standard residential workspace into a functional service bay begins long before unbolting equipment from a delivery pallet. Evaluating ceiling clearance, door opener tracks, and concrete slab strength determines whether a home shop can safely support heavy vehicles overhead. Learning how to install a car lift in a garage requires careful preparation, especially when verifying whether your floor slab meets the necessary compressive strength and thickness thresholds. Home mechanics often consult guides on residential car lift models to match their available garage bay space with the appropriate hoist design.
Bolting down a rigid lifting frame provides unmatched undercarriage access for brake overhauls, transmission swaps, and suspension servicing without crawling on creeper boards. Ensuring structural stability demands adherence to manufacturer torque specifications, correct anchor bolt embedment, and precise column plumbing with steel shims. Proper planning also prevents costly layout errors, such as placing columns too close to garage walls or interfering with overhead door tracks. Taking time to understand how to install a car lift in a garage protects your equipment, your vehicle chassis, and your personal safety during every lifting cycle.
| Award | Product | BJL Score About BJL ScoreThe BJL Score is our own rating from 0 to 10, based on performance, design and build, ease of use, and value. It reflects independent research and is never influenced by manufacturers, retailers, or affiliate commissions. Learn more › | |
|---|---|---|---|
| Best Overall |
LGYORWAY Portable Car Lift
|
9.2/10 | Buy |
| Best Value |
 KATOOL Portable Car Lift Mid Rise Scissor Lift
|
9.1/10 | Buy |
| Best Premium |
 Portable Two Post Car Lift 8000 LBS Capacity
|
9.1/10 | Buy |
 WEIZE 11000lbs Two Post Car Lift
|
9.1/10 | Buy | |
 KATOOL 11000lbs 4.0HP 2 Post Lift Car Lift
|
8.8/10 | Buy | |
| Best Budget |
 Albott 7000 LBS Portable Car Lift with Extension
|
8.6/10 | Buy |
 Albott 7000 lb Portable Car Lift with Extension
|
8.1/10 | Buy | |
 Albott 8000 LBS Portable Car Lift Quick Jack
|
8.1/10 | Buy | |
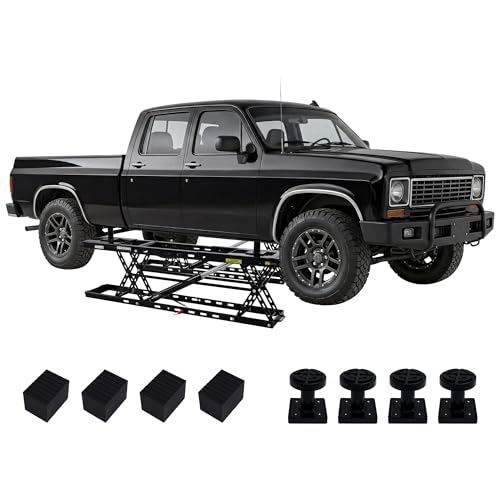 Albott 8000 LBS Portable Car Lift for Home Garage
|
7.8/10 | Buy |
Installing a vehicle lift in a residential garage transforms your maintenance routine by elevating projects to an ergonomic working height. Achieving a safe, reliable setup requires methodical planning across structural foundation validation, bay clearances, and mechanical assembly. Approaching the installation step by step ensures every component operates according to engineering specifications and manufacturer guidelines.
Site Survey and Overhead Clearance Calculations
Vertical height serves as the primary limiting factor in most residential garages. Clear-floor two-post models, such as the WEIZE 11000lbs Two Post Car Lift with its 109-inch overall height, require sufficient distance between the concrete floor and finished ceiling joists. You must also account for open garage door tracks, light fixtures, and ceiling fans that might obstruct vehicle elevation. Many garage owners convert standard door tracks to high-lift configurations or install wall-mounted jackshaft openers to free up valuable overhead space.
Calculating the required ceiling height involves adding the maximum lift rise height, the height of the tallest vehicle, and extra clearance for safety lock engagement. When raising a vehicle, you must lift it slightly past the locking stop before settling it onto the mechanical latch. For garages with restrictive 8-foot or 9-foot ceilings, mid-rise platforms like the KATOOL Portable Car Lift Mid Rise Scissor Lift offer a practical alternative with a 39-inch lifting height. Thorough dimensional measurements prevent expensive surprises once heavy steel columns arrive on site.
Assessing Concrete Slab Thickness and Compressive Strength
Surface-mounted two-post lifts impose immense tensile and shear forces on garage floor concrete. Manufacturers standardly require a minimum concrete slab thickness of 4 inches with a compressive strength rating of at least 3,000 PSI cured for a minimum of 28 days. Residential garage floors poured with unknown specifications must be verified before bolting down heavy-duty columns. Drilling a small test hole in an inconspicuous location allows you to measure slab depth accurately using a wire depth gauge.
Commercial-grade two-post units, such as the KATOOL 11000lbs 4.0HP 2 Post Lift Car Lift, exert significant pulling forces on anchor bolts when holding heavy trucks. If your concrete slab measures less than 4 inches thick or displays widespread crumbling, you should not install a two-post frame-contact lift. In situations with inadequate concrete, pouring dedicated footing pads or selecting free-standing hydraulic car lift systems provides a safer mechanical approach. Professional structural engineers or concrete contractors can confirm whether slab retrofitting is necessary for your building.
Navigating Post-Tension Slabs and Expansion Seams
Post-tensioned concrete slabs present severe safety hazards during rotary hammer drilling operations. These foundations contain high-strength steel cables stretched under extreme mechanical tension before the concrete cures. Striking a live post-tension tendon with a masonry drill bit can cause catastrophic slab rupture, severe physical injury, and structural foundation failure. Garages constructed on post-tension slabs generally display an embossed stamp or brass plaque in the concrete stating that drilling is strictly prohibited.
Anchor bolt placement must also maintain adequate edge distance from slab perimeters and expansion seams. Setting wedge anchors closer than 6 inches to an expansion joint or relief cut severely degrades holding capacity. Expanding anchor sleeves exert outward radial pressure that can crack or blow out unsupported concrete edges. Selecting portable units like the Albott 7000 LBS Portable Car Lift with Extension avoids slab modification entirely when drilling is impossible or unsafe.
Receiving Freight and Uncrating Lift Assemblies
Automotive lifts arrive via less-than-truckload freight carriers packaged inside heavy steel shipping crates. Delivery trucks typically lack residential liftgates capable of handling crates weighing over 1,500 pounds and measuring up to 12 feet long. Buyers must arrange offloading solutions in advance, such as hiring a flatbed tow truck with a winch, utilizing a tractor with pallet forks, or scheduling pickup at a local freight terminal. Confirming equipment delivery logistics beforehand eliminates expensive carrier redelivery fees and site delays.
Uncrating the equipment requires heavy-duty pry bars, metal shears, and careful parts organization. Inspect every steel column, carriage assembly, hydraulic cylinder, and hardware package for transit damage before signing delivery receipts. Group fasteners, hydraulic fittings, equalization cables, and anchor bolts into organized trays near the installation area. Having an engine crane or heavy-duty machinery dolly available makes staging heavy steel uprights inside the garage bay significantly easier.
Bay Layout and Squaring the Chalk Lines
Precise column placement ensures smooth drive-through clearance and balanced vehicle weight distribution. Begin by snapping a primary centerline chalk line extending straight into the bay from the garage doorway. Measure the exterior width specified by the manufacturer, such as the 137-inch overall dimension on full-size clear-floor frames. Establish a perpendicular cross line using the 3-4-5 geometric rule to verify that your layout remains completely square to the bay walls.
Positioning the columns must also account for vehicle balance and door swing clearance. Asymmetric lift arms shift vehicle center of gravity rearward, allowing vehicle doors to swing open past the upright posts. Symmetric configurations position vehicles centered between columns, which is well-suited for long-wheelbase pickups and commercial vans. Double-check all measurements from the garage door threshold to ensure the vehicle hood and tailgate clear closed garage doors during operation.
Drilling and Setting Wedge Anchor Bolts
Securing lift baseplates demands a heavy-duty rotary hammer drill equipped with a high-grade carbide masonry bit. Standard hammer drills lack the impact energy needed to bore clean, perpendicular holes into cured structural concrete. Drill directly through the baseplate holes or mark hole centers, moving the column aside before drilling. Maintain a consistent 90-degree angle to the floor surface so anchor studs remain perpendicular under tension.
Debris removal is critical because lingering concrete dust prevents wedge anchor sleeves from expanding properly. Use compressed air, a wire bottle brush, and a shop vacuum to clean each drilled hole thoroughly. Drive the anchor bolts into the concrete using a brass hammer to protect the threads until the washer rests flat against the baseplate. Tighten each anchor bolt with a calibrated torque wrench according to the manufacturer specification, which typically ranges between 85 and 110 foot-pounds.
Column Plumbing and Leveling with Horseshoe Shims
Garage floors feature intentional slopes toward the vehicle entrance door to facilitate water drainage. Installing lift columns directly onto an uneven floor causes vertical misalignment, binding internal carriage sliders and wearing mechanical parts prematurely. Place a precision magnetic spirit level along both the inside face and lateral edge of each steel column to check plumb. Horseshoe-style steel shims must be placed under baseplate corners to compensate for slab slope.
Never exceed the manufacturer limit for shim stack thickness, which is generally restricted to one-half inch. If a garage floor exceeds standard slope tolerances, you may need a specialized leveling pour or recessed foundation pads. Retorque all anchor bolts after sliding shims into position to ensure even clamp force across the baseplate. Verifying that both columns stand perfectly plumb and parallel prevents binding throughout the full carriage stroke.
Overhead Crossbeam and Floor-Plate Assembly
Two-post lift designs manage structural synchronization using either an overhead crossbeam or a floor-plate track. Clear-floor models mount a heavy steel beam across the top of both columns, providing an unobstructed floor surface underneath. Raising the overhead crossbeam requires two individuals using ladders or a mechanical material lift to align mounting bolt holes safely. Fasten all crossbeam bolts loosely before final torque tightening to prevent mechanical binding across column uprights.
Floor-plate lifts run synchronization cables and hydraulic hoses across a low-profile steel threshold bolted between column bases. This configuration accommodates lower garage ceilings where tall overhead beams cannot fit. Ensure the beveled protective cover sits flush against the floor to protect vital hydraulic lines from drive-over damage. Portable models, including the DigMaster Portable Two Post Car Lift 8000 LBS Capacity, simplify this process by using mobile base frames that balance structural rigidity with workshop flexibility.
Routing and Synchronizing Equalization Cables
Heavy steel wire ropes synchronize the lifting carriages to keep vehicle elevation level across both sides. Equalization cables do not carry lifting weight during static holds, but they prevent one cylinder from outpacing the other during travel. Route each cable through the internal column pulleys, sheaves, and overhead guides following the manufacturer diagram. Ensure cable strands sit cleanly inside pulley grooves without crossing or chafing against structural internal gussets.
Tensioning the cables requires raising the carriages onto the first mechanical safety lock ladder stop. Tighten the cable adjustment nuts at carriage connection points until both cables display equal tension when pulled by hand. As carriages raise, listen carefully for the audible click of mechanical safety latches engaging the column ladders. Both latches must drop into their respective locking slots simultaneously, confirming that the synchronization system is balanced and operational.
Hydraulic Plumbing and System Bleeding
Hydraulic fluid transfer powers the primary elevation mechanism on modern automotive hoists. Mount the electric-hydraulic power unit to its designated column bracket using supplied isolation dampeners to minimize vibration. Connect high-pressure hydraulic hoses to cylinder ports and power unit manifolds, using thread sealant on tapered fittings while keeping hose interiors spotless. Fill the fluid reservoir with clean, manufacturer-specified ISO AW-32 or ISO AW-46 hydraulic oil.
Air trapped inside hydraulic lines creates spongy elevation, shuddering descent, and uneven cylinder movement. Bleeding the system requires cycling the carriages upward several inches and opening bleeder screws located on top of the cylinder caps. Allow trapped air bubbles to escape until a solid stream of clean hydraulic fluid emerges, then retighten bleeder screws securely. Professional service shops running heavy-duty automotive lifts repeat this bleeding procedure after initial break-in cycles to guarantee smooth cylinder operation.
Electrical Circuit Requirements and Wiring
Motor requirements dictate garage electrical panel demands for auto lift power units. Most fixed two-post models utilize a 220V single-phase motor producing between 3.0 and 4.0 horsepower, demanding a dedicated 30-amp circuit breaker. Operating a powerful motor on an undersized circuit or shared domestic line causes voltage drops, tripping breakers and overheating motor windings. Wire the motor using appropriate copper conductor sizing, such as 10-gauge wire, protected inside flexible metal conduit.
Smaller scissor platforms or portable single-post units, like the LGYORWAY Portable Car Lift or 110V scissor lifts, offer simpler connection to standard household outlets. On clear-floor models equipped with overhead beams, connect the padded safety shutoff microswitch directly to the motor control circuit. This microswitch immediately cuts electrical power to the hydraulic pump if a tall vehicle roof contacts the overhead bar. Always consult a licensed master electrician to ensure your power unit wiring complies with local electrical codes.
Mechanical Safety Testing and Load Verification
Before placing any vehicle onto lifting arms, conduct comprehensive dry-run functional tests without load. Raise the empty carriages smoothly to full extension while observing hose clearance, cable tracking, and limit switch operation. Test the safety lock release mechanism, verifying that dual locking pawls or single-point release levers disengage freely from column ladders. Lower the carriages completely to verify that automatic arm restraint gears unlock when arms reach lowered rest positions.
Perform initial load testing using a standard passenger car positioned at manufacturer-designated chassis lifting points. Raise the car 12 inches off the ground, check vehicle balance by applying firm downward pressure to the bumper, and lower the carriage onto safety locks. Inspect all concrete anchor studs with a torque wrench to ensure zero movement or concrete cracking occurred under load. Conducting disciplined safety inspections guarantees long-term lifting confidence and dependable service throughout your vehicle ownership journey.
Installing a garage car lift successfully relies on patience, verified foundation strength, and strict adherence to structural assembly steps. Taking time to verify concrete depth, plumb vertical columns, and balance equalization cables creates a dependable workspace built for years of demanding automotive maintenance. Always perform initial calibration and load testing methodically before undertaking major vehicle repairs.
About the author
Peter Nelson is an automotive writer whose published work includes off-road jacks, power tools, vehicle maintenance, and garage equipment. His coverage connects product features with practical applications, helping readers think through equipment choices for everyday repairs, project vehicles, and off-road situations.